The Coinsnap Bitcoin Paywall plugin allows you to lock WordPress posts and unlock them using fast, non-custodial Bitcoin Lightning payments.
Follow the steps below to install the plugin and connect it to either Coinsnap or BTCPay Server.
Install the Bitcoin Paywall Plugin
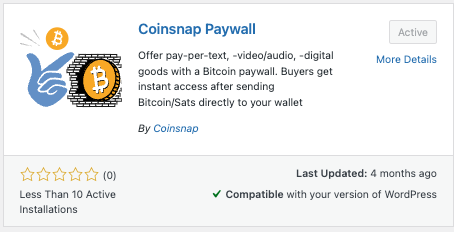
You can install the plugin in two different ways.
Option B: Install from GitHub (Developers)
-
Open the GitHub repository
-
Download the latest release ZIP
-
Upload it via the plugin uploader
-
Activate the plugin
This option is ideal for developers or users who want cutting-edge updates.
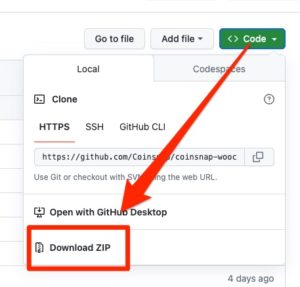
If you want to install the Coinsnap Bitcoin Paywall, you must first download it from the Coinsnap Github page here.
Then look for the green button labeled “Code”. When you click on it, the menu opens and Download ZIP appears.
Here you can download the latest version of the Coinsnap Bitcoin Paywall to your computer.
First you download the plugin from Github.
Then you have to upload the ZIP in the plugin administration of WordPress:
Choose Your Payment Processing Method
The plugin supports two non-custodial payment providers:
3. Setup with Coinsnap
Coinsnap is the simplest way to use Lightning payments on WordPress without running your own node.
Step 1 — Create a Coinsnap Account
-
Visit https://app.coinsnap.io
-
Create an account
-
Add your Lightning wallet for direct payouts
-
Add your xPub to receive Bitcoin on-chain directly into your wallet
Coinsnap is fully non-custodial; all funds go to your own wallets.
Step 2 — Create a Store
Inside Coinsnap:
-
Navigate to Stores → Create Store
-
Give your store a name
-
Configure payout settings
-
Save the store
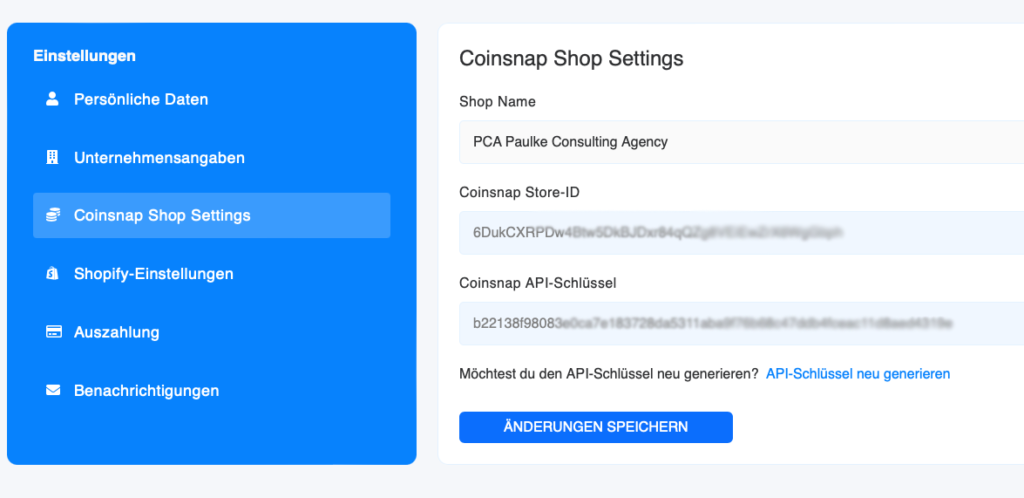
Step 3 — Generate Store Credentials
Inside your Coinsnap Store:
-
Open API Keys
-
Create a new API Key
-
Copy:
-
Store ID
-
API Key
-
You will paste these into WordPress.
4. Setup with BTCPay Server
This option is for users who want full Bitcoin sovereignty.
Requirements
To use BTCPay Server you need:
-
Your own BTCPay Server instance
-
A running Lightning node (LND, Core Lightning, Eclair)
-
A store configured inside BTCPay Server
Step 1 — Create a Store in BTCPay Server
-
Log into your BTCPay Server
-
Go to Stores → Create Store
-
Set up Bitcoin and Lightning payment methods
-
Verify your node connectivity
Step 2 — Create an API Key
-
Go to Account → Manage API Keys
-
Generate a new key
-
Grant permissions to create invoices
-
Copy the API Key
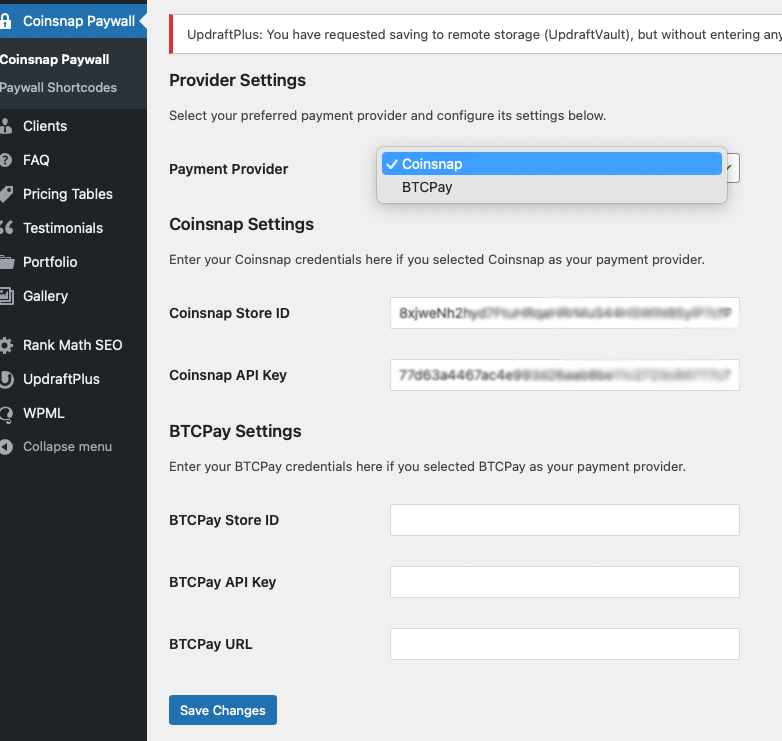
Step 3 — Connect WordPress to BTCPay Server
In your WordPress admin panel:
-
Go to Settings → Coinsnap Paywall
-
Choose BTCPay Server as provider
-
Enter:
-
BTCPay Server URL
-
Store ID
-
API Key
-
-
Save your settings
Your WordPress site will now route all Lightning invoices through your BTCPay Server.
Create Bitcoin Paywall
1. create a paywall shortcode
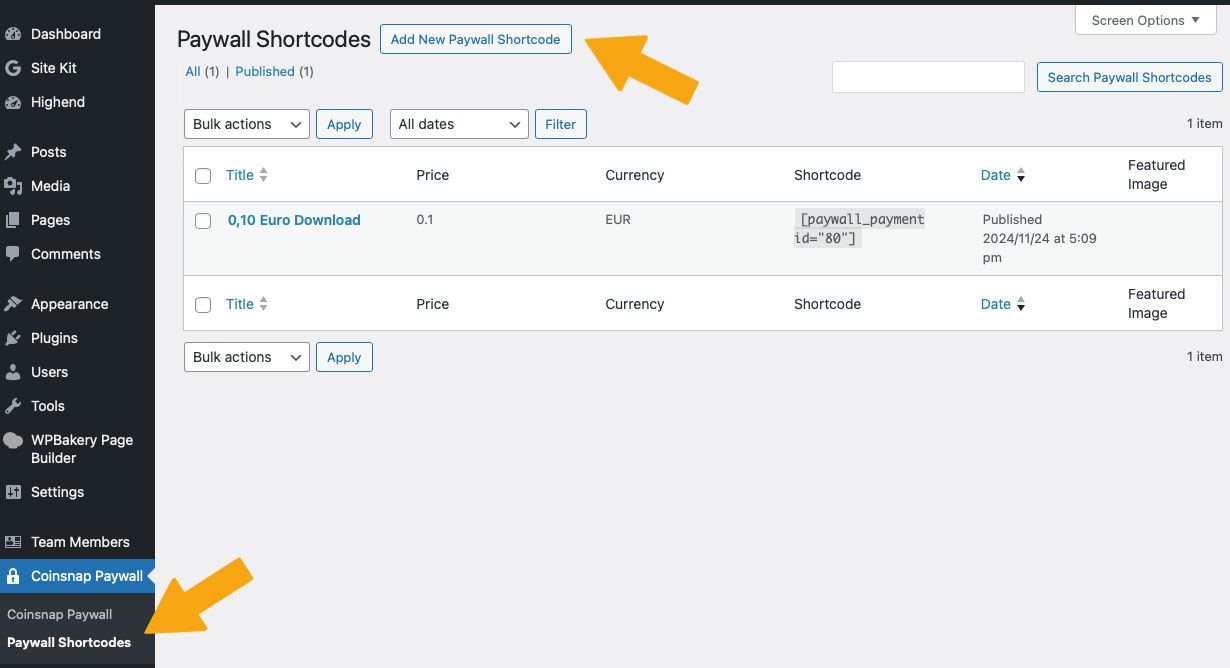
Go to Coinsnap Bitcoin Paywall in the sideboard on the left in your WordPress and click on Paywall Shortcodes.
Then click on “Add New Paywall Shortcode” at the top.
2. configure your paywall shortcode
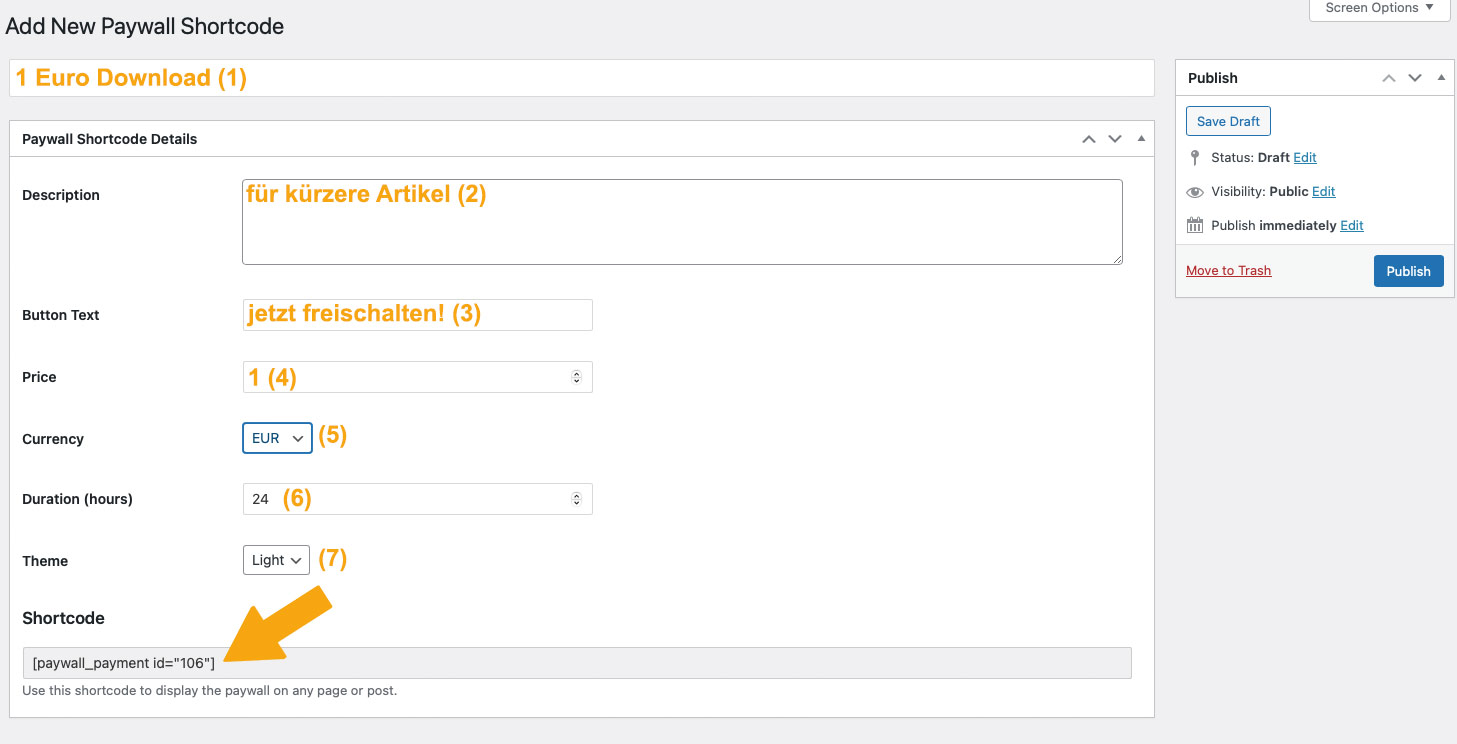
In the window that now appears, make the following settings (see orange entries):
- First you assign a name so that you know later what the short code is intended for.
- Then you can enter a short description as background information for yourself or your editors.
- Then set the text of the payment button.
- Set your price!
- Select the currency in which the price is to be displayed
- Set the duration of the activation and
- select the color scheme of the paywall.
Now you can copy the shortcode at the bottom and use it in your content (see below).
Put content behind the Bitcoin paywall
Create content
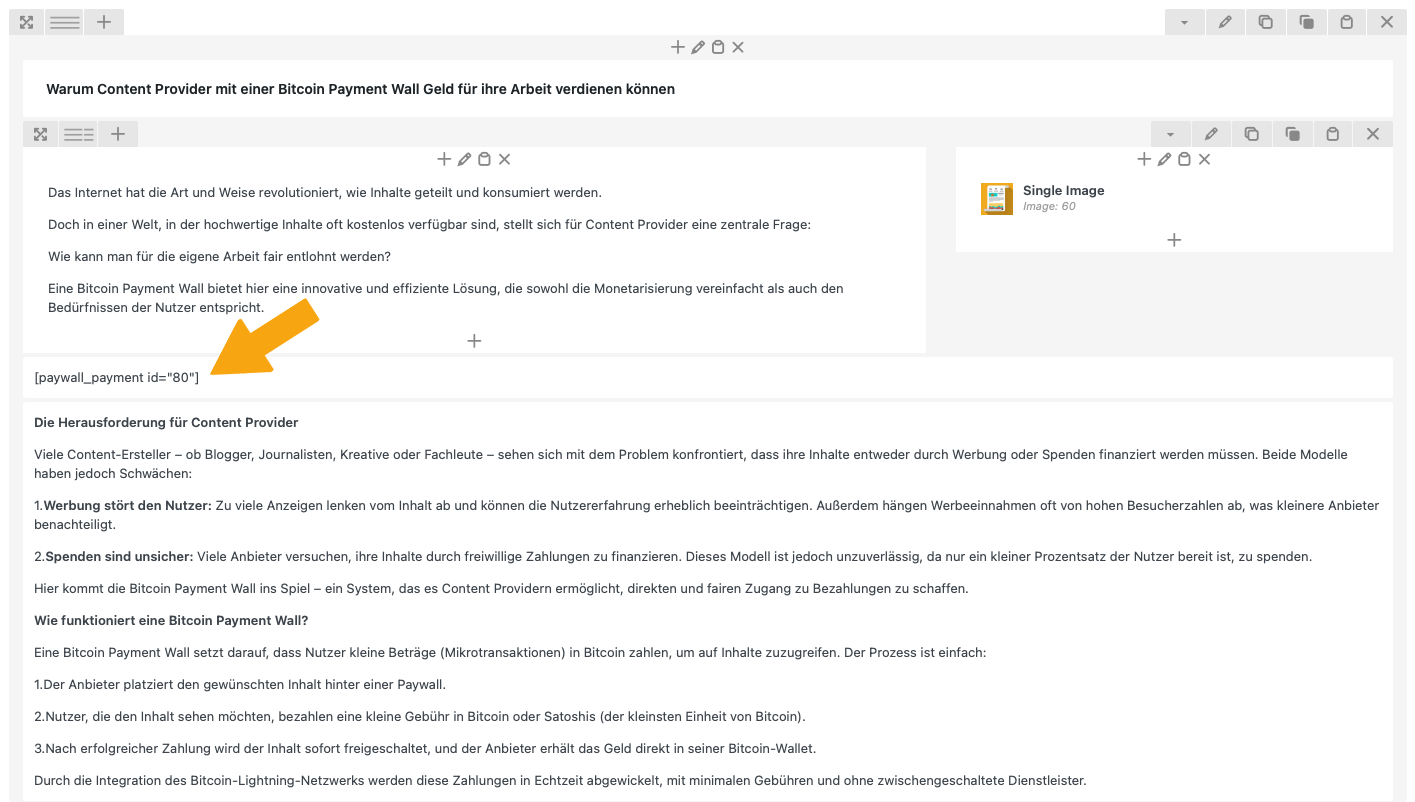
Now create content as usual in your WordPress, for example a text as in this example.
As soon as you have finished the article, you must place the shortcode you have just produced at the point where you expect payment from your reader. You usually do this after the introductory paragraph, see right:
Test Your Paywall
To verify everything works:
-
Open your protected article in a private browser window
-
Confirm that the content is hidden
-
Initiate a Lightning payment
-
After the invoice is paid, the page should unlock immediately
A small, technically required cookie is stored in the reader’s browser so they can return and still access paid content.
No tracking cookies are used.
You’re Ready to Go!
You can now start earning sats with Pay-Per-Article or Pay-Per-Post monetization.
If you need assistance:
-
Visit our Documentation
-
Check the GitHub Issues
-
Contact Coinsnap Support

