Pay-per-Post Module
This is how you install the pay-per-post module on your WordPress site.
Pay-per-Post is used for selling single blog posts and newspaper articles.
In this article we describe how to:

General settings in backend
General Settings
In the backend, the Pay-per-Post module can be configured to the individual requirements via the menu item Modules.
The general settings are made here, which are used for all blog post entries. Individual settings can be made at any time for the individual blog posts. If no individual settings are made, the General Settings are used, which are set here.
Default Price
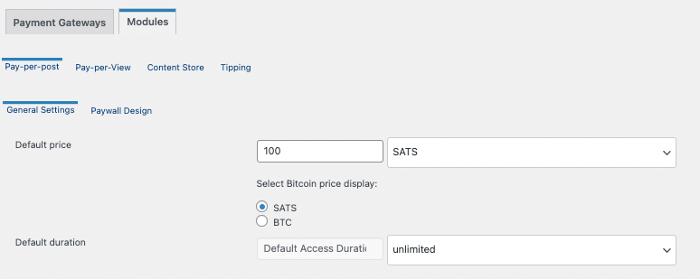
Default Price is used to specify the unit price for the blog post for which the reader can unlock the article. This price can be specified in Sats or in USD or Euro.
If the price is specified in a fiat currency such as USD or EUR, then based on the currently valid Bitcoin exchange rate, the amount is converted to Bitcoin and displayed to the reader.
When selecting Select Bitcoin Price display, it can be selected whether the bitcoin price is displayed to the reader as Sats or BTC. If you select Sats, then the bitcoin price will be displayed as 100,000 sats. If you choose BTC, then the price will be displayed as 0.00100000 BTC.
Default duration
Default duration defines how long the reader will have access to the purchased item.
Is it allowed to access the article again indefinitely after payment or only for a certain period of time.
The access permission is controlled by cookies, which are stored in the reader’s browser.
Re-access is only possible if the same browser is used and the cookie is not deleted.
User information
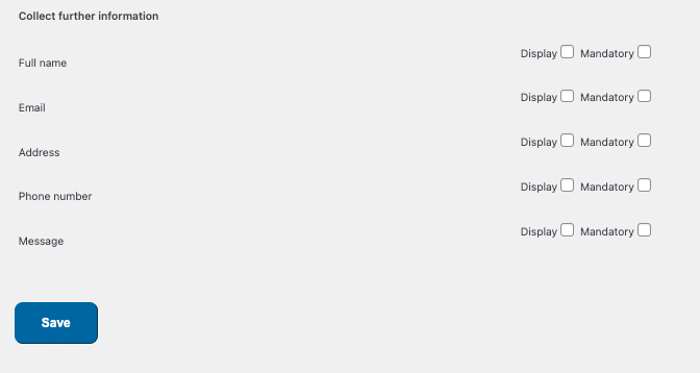
At this point you can request further information from the reader.
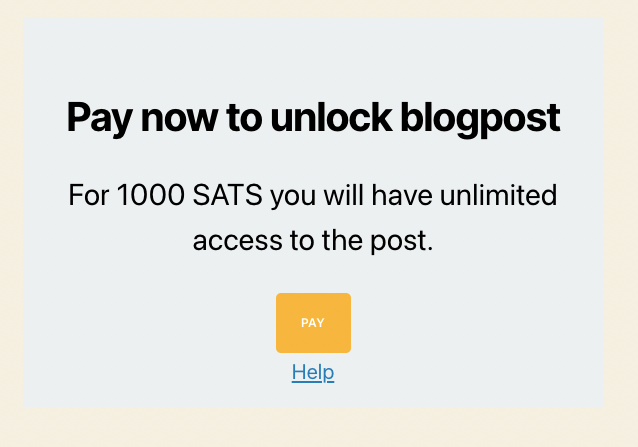
If the customer clicks on pay in the paywall, he will not be redirected directly to the payment page, but first to a checkout page.
On this checkout page the fields are displayed, which can be selected here.
If you select the Display option, the field will be displayed. The field does not have to be filled in by the reader, but may remain empty.
If the checkbox Mandatory is set, then this field is displayed and must be filled in by the reader.
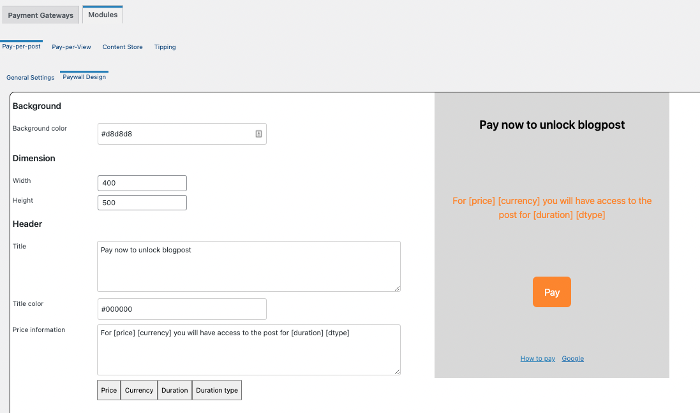
In the PayWall Design area, the appearance of the PayWall can be adapted to the reader’s own wishes and design.
The effects of the changes made are displayed in the preview window on the right.
Background
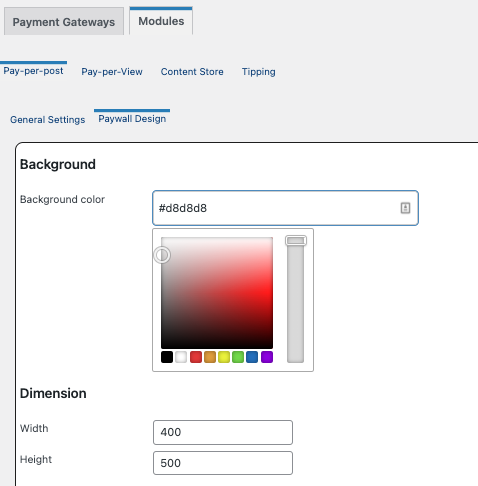
In this area the background color of the PayWall can be set. The color values are stored as HEX values.
Dimension
In this area you can set the dimensions of the PayWall in Width and Height.
Header
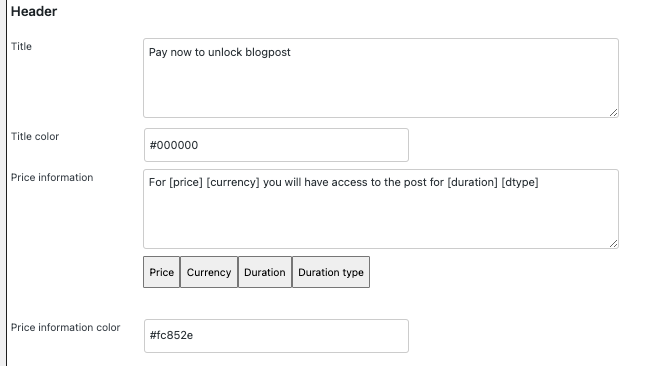
The header of the PayWall is stored in the Title field. With Title Color it can be defined in which color the header is displayed.
Price Information can be used to specify the text that the customer will be shown about the price and the duration of access to the item.
The four parameters:
[price]
[currency]
[duration]
[dtype]
are variables and have to be taken over in this form.
The actual values are then taken from the settings under General Settings or from the individual settings for the individual blog post.
The color in which the price information is displayed is set via Price information color.
Button
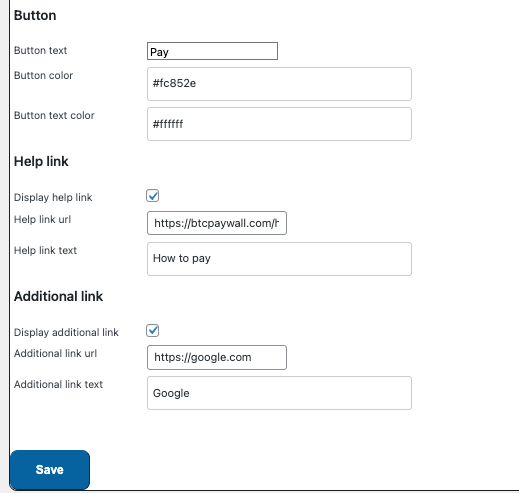
The payment button can be customized at this point. With Button text the corresponding text that will be displayed on the button. The color of the button is set with Button color and the color of the text on the button is set with button text color.
Help & Additional Link
It is possible to provide the reader with additional helpful links. Up to two additional links can be displayed.
This can be, for example, a link to a help page where the reader can get further support or to alternative products and offers.
Insert pay-per-post in blog posts via editor
The pay-per-post feature can be inserted on any blog post or page within WordPress.
There is a start and end area for it, which delimits the part that should be protected by the paywall.
At the point where the paywall starts, the start command is inserted.
If the paywall is to be ended and the following text is to be displayed to everyone again, the end command is inserted.
BTCPayWall supports the most common WordPress website editors, such as Gutenberg, WPBakery and Elementor.
There are predefined elements available, which can be found in the element search under BTCPW (as an abbreviation for BTCPayWall).
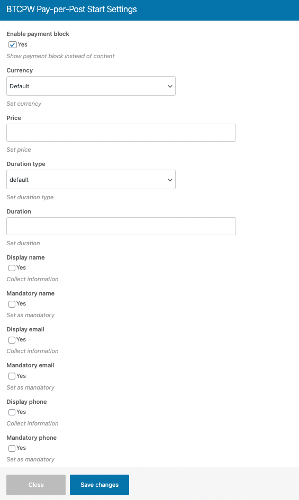
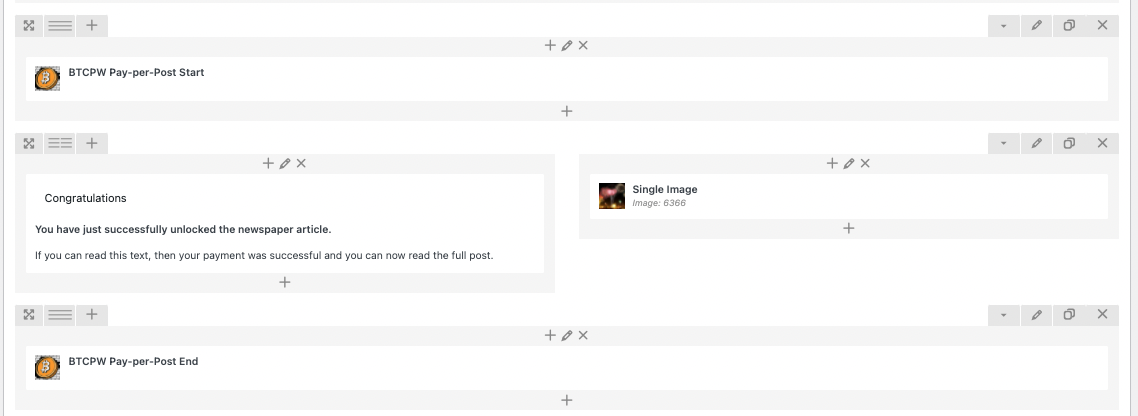
At the point where the PayWall starts, the element called BTCPW Pay-per-Post Start is inserted.
The BTCPW Pay-per-Post Start settings can be changed individually. If no changes are made, the settings are taken from the General Settings.
Changes should only be made if they differ from the General Settings settings.
It is important to make sure that the check mark for “Enable Payment Block” is set, because only then will the paywall be displayed on the web page.
After that, the text can be continued normally, as you are used to when creating blog posts.
At the end of the area, which is to be protected by the paywall, the element with the name BTCPW Pay-per-Post End is then inserted.
If the text at the beginning and at the end has been provided with the BTCPW Pay-per-Post element, then it will look something like this:
Insert pay-per-post via shortcode.
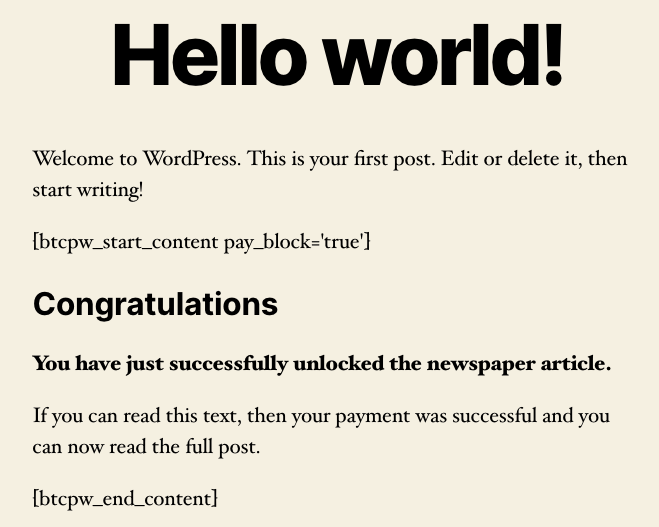
If you don’t edit your website with a special website editor for WordPress, you can also insert the Start and End command into your website via shortcode.
For the content to be displayed behind the paywall, the command btcpw_start_content is used.
For the paywall to be activated, the pay_block must be activated with the addition true.
With false the paywall can be deactivated again.
The settings from the General Settings are used.
If you want to make individual settings for a specific post, then this can be done with the following commands:
– pay_block = false
– price = the amount, which was set in the General Settings
– currency = the currency defined in the General Settings
– duration = the time period defined in the General Settings
– duration_type = the type of period specified in the General Settings
To use the attributes, the values must be enclosed in straight quotes, single quotes or double quotes. Using curly or smart quotes will result in an error.
At the end of the blog post, the protected area is closed with the btcpw_end_content command.
The commands then look like this:
Start of the protected area including activation of the PayWall:

End of the protected area:




Leave a Reply
Your email is safe with us.