Setup BTCPay Store for BTCPayWall
The BTCPay server is used to settle the payment processing of the BTCPayWall with Bitcoin and by Lightning. With a BTCPay Server, you are your own Bitcoin payment provider and can organize the payment processing of Bitcoin and Lightning on your own.
BTCPay Server is a free and open-source software that allows you to be your own Bitcoin payment processor. BTCPay Server supports a variety of ways to run your own BTCPay Server.
An overview of the different deployment methods can be found at BTCPay Server Choosing a Deployment Method.
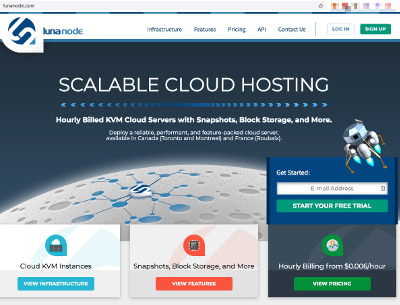
You can run a BTCPay server on your own server. Already for less than $8,- per month there are hosters (VPS) like LunNode that offer the hosting of an own BTCPay server including Bitcoin Blockchain and Lightning Node.
You can either set up your own BTCPay server or we can do it for you.
Alternatively, you can also use our existing Coincharge BTCPay server.
Hosting / VPS
How you can set up and run your own BTCPay server for less than $8,- per month at the hoster LunaNode, you can read in the article: LunaNode Hosting on Coincharge.
You can either set up your own BTCPay server or we can do it for you.
Hardware Node
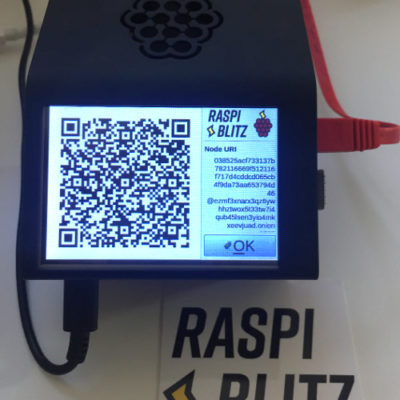
Hardware node providers have already preinstalled the BTCPay server on the node. This is the case on the hardware nodes of the providers Nodl, Umbrel, myNode and Raspiblitz.
3rd Party BTCPay Server
If you do not want to operate your own BTCPay server, you can also use the services of so-called 3rd party hosters. These providers make the corresponding BTCPay Store available on their own BTCPay servers.
Coincharge also provides a 3rd party solution under the address: https://btcpay.coincharge.io.
Here, publishers can use the Bitcoin payment processing functions free of charge and have the Bitcoin forwarded to their own Bitcoin wallet.
If you use the BTCPay server solution of a 3rd party provider, you can usually only offer Bitcoin payments to your customers.
To accept additional Lightning payments, a dedicated Lightning node is required or the 3rd party provider supports LNbank on its BTCPay server.
As already described above, this can be easily implemented with an own BTCPay server at a hoster (such as Lunanode) or the use of a hardware node.
If you would like support in setting up your own BTCpay server including a Lightning node to receive Bitcoin and Lightning payments without restrictions, please contact Coincharge and we will implement this for you.
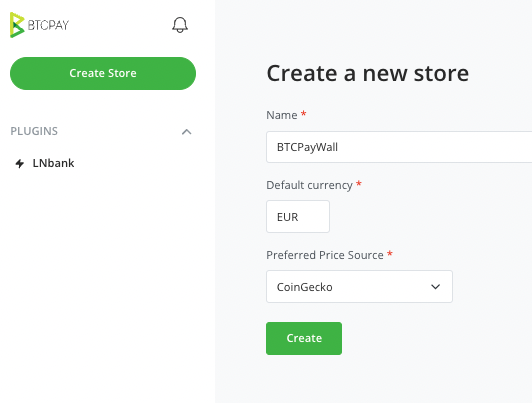
Create a BTCPay Store
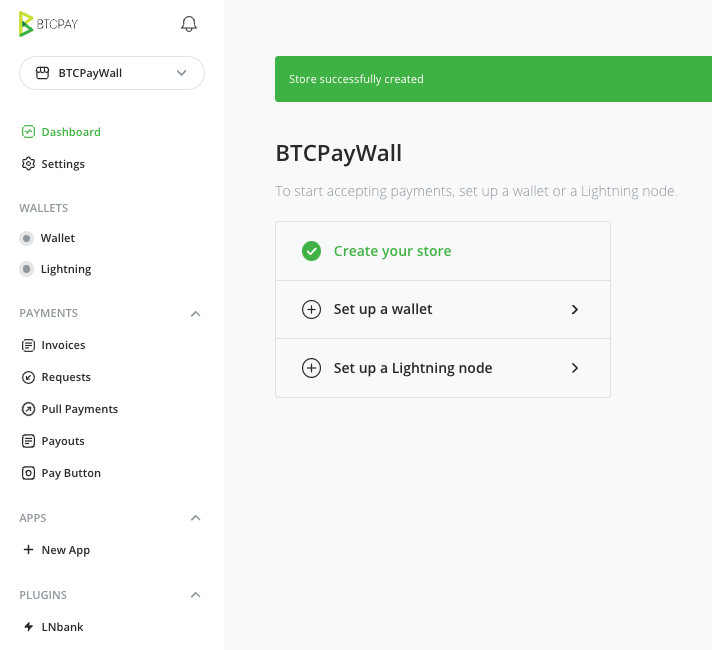
Set up a wallet
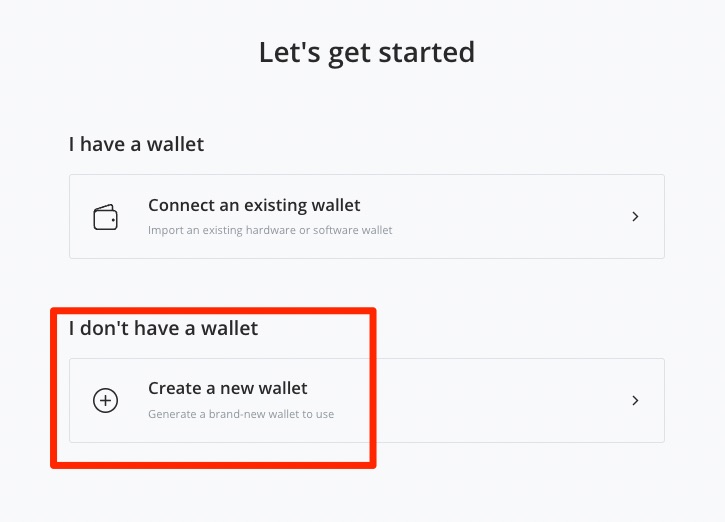
After creating a BTCPay store, we need to create a new Bitcoin wallet or deposit an existing Bitcoin wallet.
If we already have a hardware wallet, then we can deposit the xPub key via existing wallet.
How to store an xPub key from an existing Bitcoin wallet is described in Where can i find my xPub Key.
At this point we continue with the creation of a new wallet.
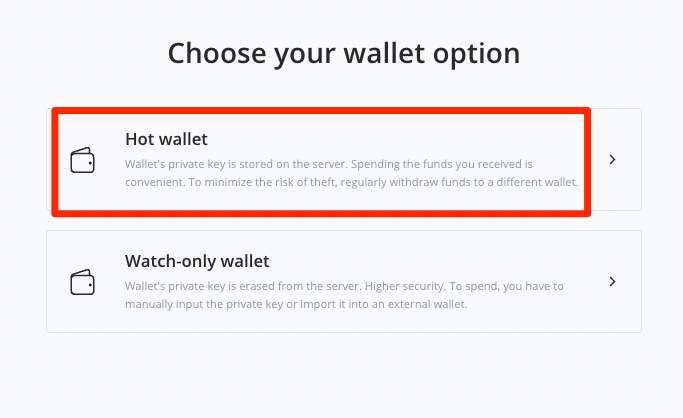
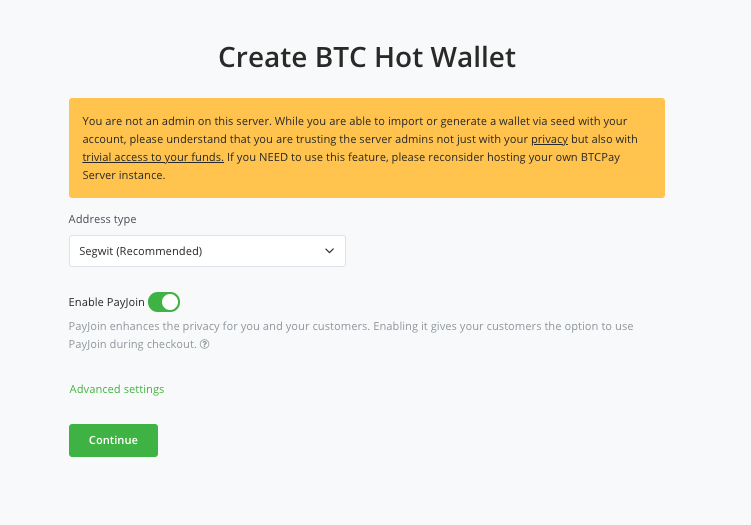
We choose the Hot Wallet function.
This means that the credits in Bitcoin are directly credited to the internal BTCPay wallet.
We choose the Hot Wallet function.
This means that the credits in Bitcoin are directly credited to the internal BTCPay wallet.
If it is not our own BTCPay server and therefore not an administrator, the warning message appears that there is a risk to the credit.
We always recommend using your own BTCPay server. Use someone else’s BTCPay server for testing purposes and small amounts only.
Transfer your Bitcoin funds to your own Bitcoin wallet as soon as possible.
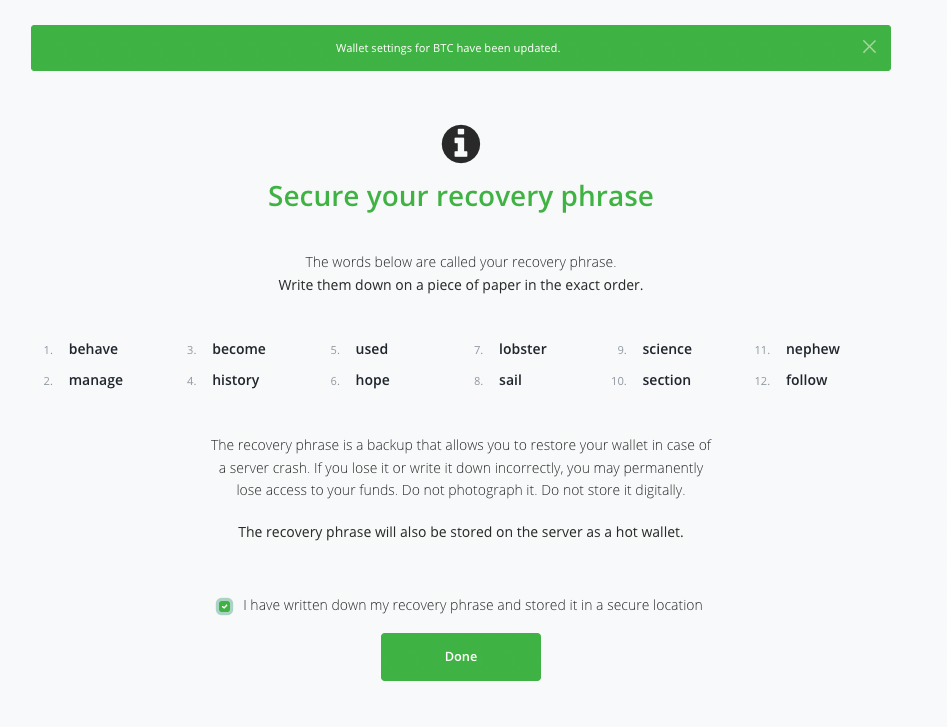
You get your own seed with BTCPay Wallet.
Thus, you have a security for your Bitcoin balance.
With this seed you have access to your Bitcoin balance at any time.
Write down these 12 words and put it in a safe place.
You can deposit these 12 words in any other Bitcoin wallet and thus get access to your Bitcoin balance again.
BTCPay Store Settings > General Settings
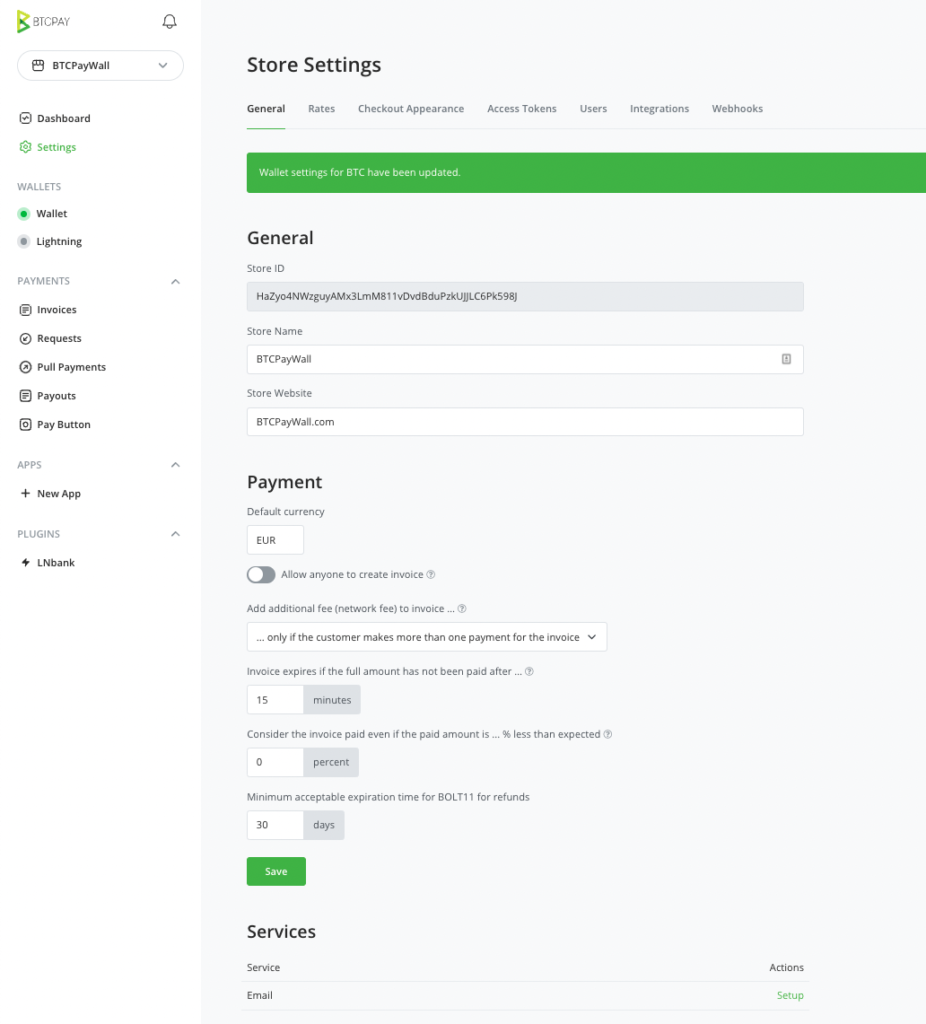
We will then be redirected to the settings for the BTCPay store.
In this General Settings we can make minor additions.
We have added the store name and the store web pages here.
We click on Save and switch from the General Settings to the Rates Settings.
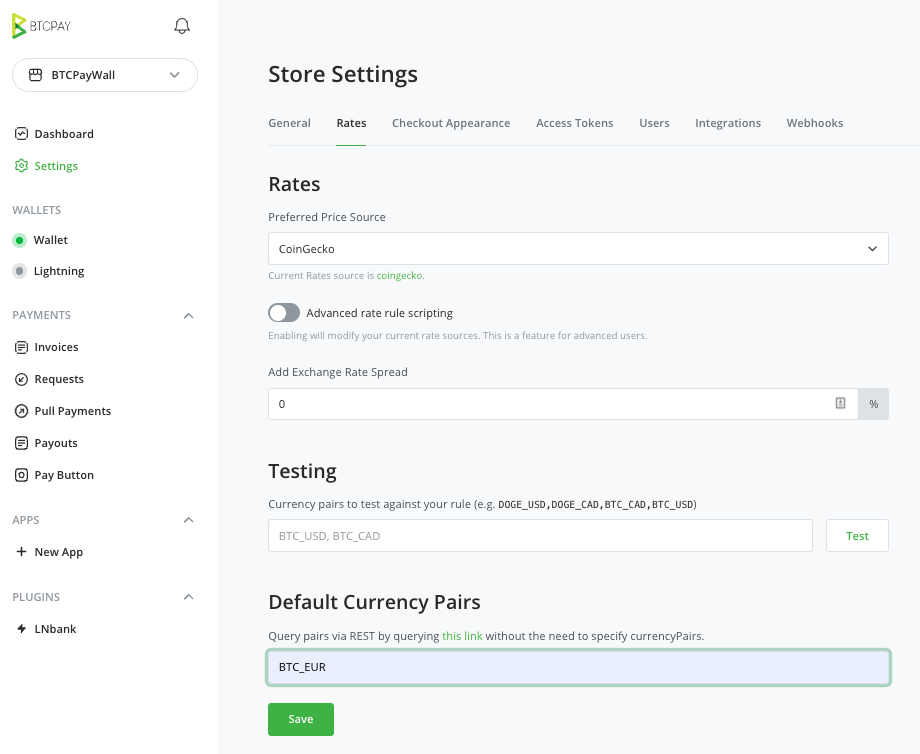
In the Rate settings, under Default Currency Plan, we enter the currency pair on the basis of which the conversions will be made.
If all prices on our website are displayed in Euro, then we use the currency pair BTC_EUR. If the prices are in US dollars, then accordingly BTC_USD. In the Testing field, we can try this out and then get the valid bitcoin rate in our currency displayed.
Wallets > Lightning
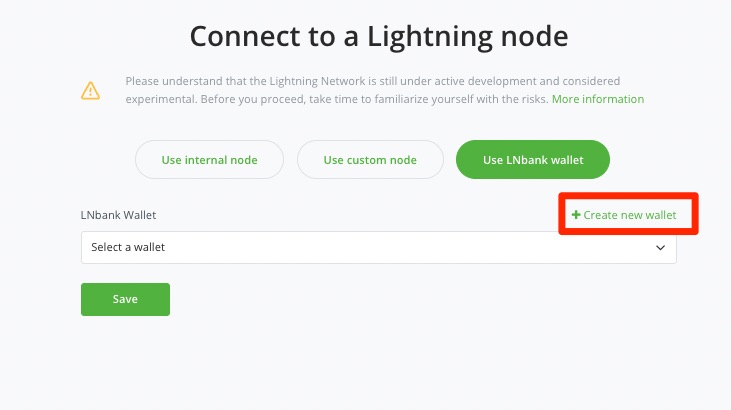
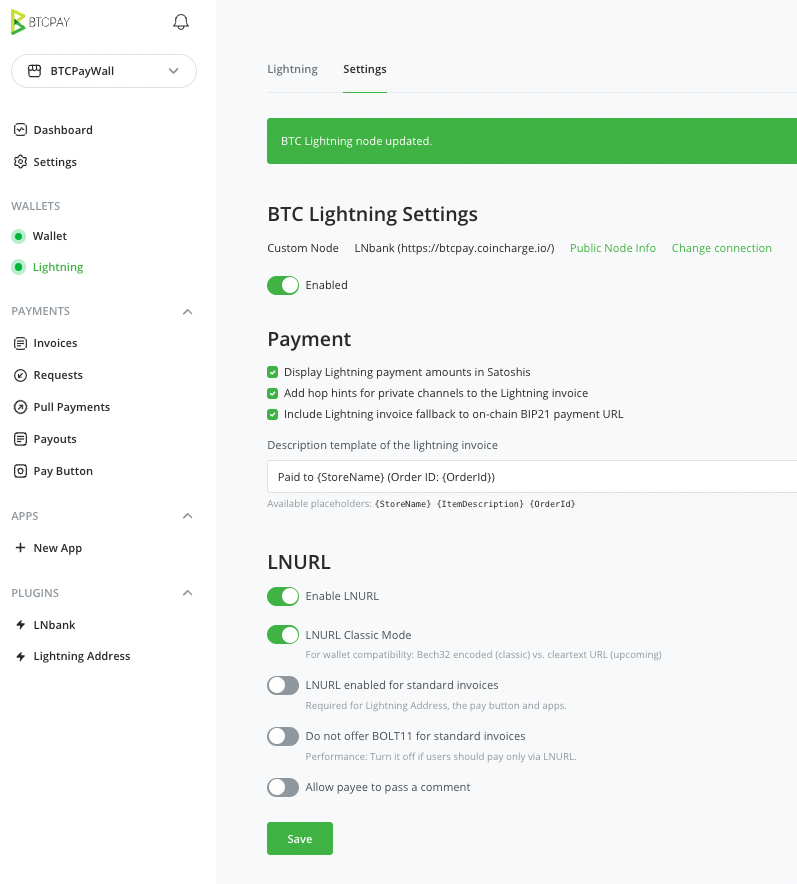
In order for us to also receive Lightning payments, we need to connect to a Lightning Node.
We click on the menu item Lightning under Wallets.
If we run our own BTCPay server, we use the Internal Node.
In our example we use the existing BTCpay server from Coincharge. Therefore, we use the LNbank wallet.
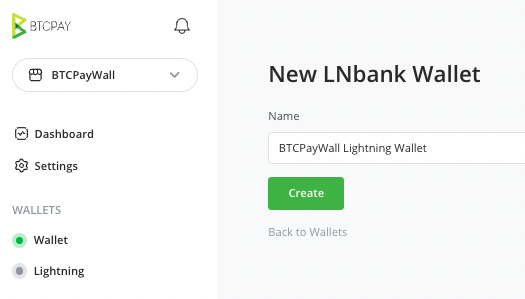
With Create a New Wallet we create a Lightning Wallet.
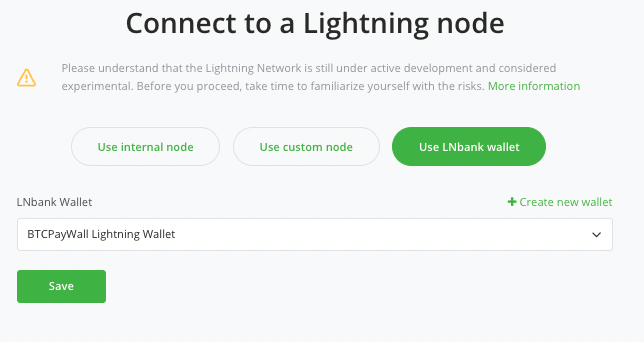
Then we select this LNbank Wallet so that Lightning payment receipts are credited to this LNbank Wallet.
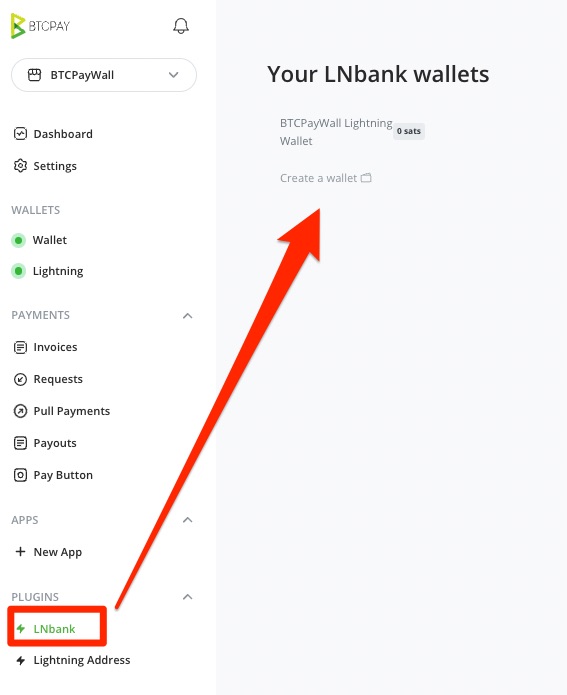
To access your LNbank Lightning Wallet, click on LNbank in the bottom left corner and you will be taken to your Lightning Wallet.
You can find more information about LNbank at: LNbank Lightning Wallet for BTCPay Server.
Store Settings > Checkout Appearance
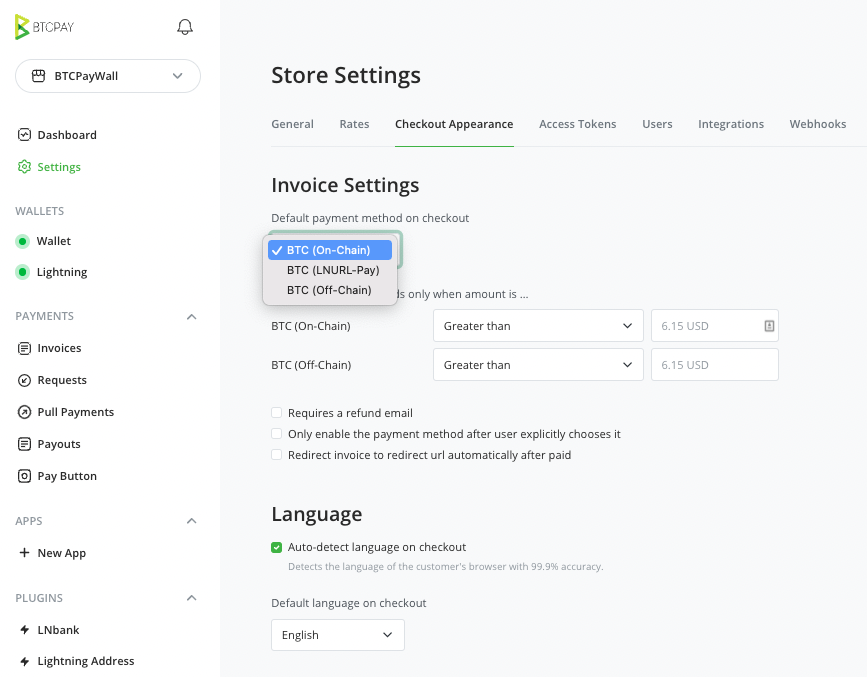
In the Store Settings under Checkout Appearance, settings can be made that affect the payment window for the customer.
Should the customer be shown a Bitcoin address or a Lightning invoice as the default setting. This can be set here.
One can also set at what threshold a Bitcoin (on-chain) or a Lightning (off-chain) payment is offered to the customer.
It is recommended that the checkout payment page is displayed to the customer in the language that has been set as the browser language. For this purpose, you should enable Auto-detect language.
However, you can also set a default language yourself. For example, if the language of the website is German, it is recommended that the Checkout Payment Page is also set to German.
After we have successfully set up a BTCPay Store including a Bitcoin Wallet and a Lightning Wallet, we need to connect our BTCPayWall and our BTCPay Store.
We explain this in Setting up a payment gateway for BTCPayWall.


Leave a Reply
Your email is safe with us.