Add BTCPayWall by Elementor
In this tutorial we explain how to use the WordPress editor of Elementor to integrate the different applications as elements in your WordPress site.
If you use another WordPress editor instead of Elementor, you will find corresponding instructions for WPBakery, Gutenberg and for the integration via shortcode.
Elementor is a WordPress website builder and you can drag and drop elements into a WordPress site.
After you have installed BTCPayWall, Elementor will show you the BTCPayWall elements.
Below we describe the different integration options per element for the different functions.

Pay-per-post / Pay per single Blog Post
If you use Elementor Website Builder, you can add the Bitcoin Paywall as an element in the text.
To do this, use the Add Elements function in Elementor.
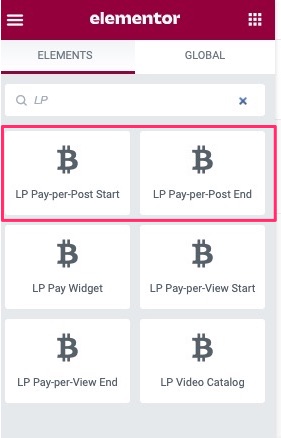
In the element search you can search for BTCPW (Abbreviation for BTCPayWall) and get the available Bitcoin Paywall elements.
The BTCPayWall blocks start with BTCPW for BTCPayWall.
You can find the Bitcoin Paywall elements using the search or in the General section.
The name of the pay-per-post Elements at Elemenetor are:
- BTCPW Pay-per-Post Start
- BTCPW Pay-per-Post End
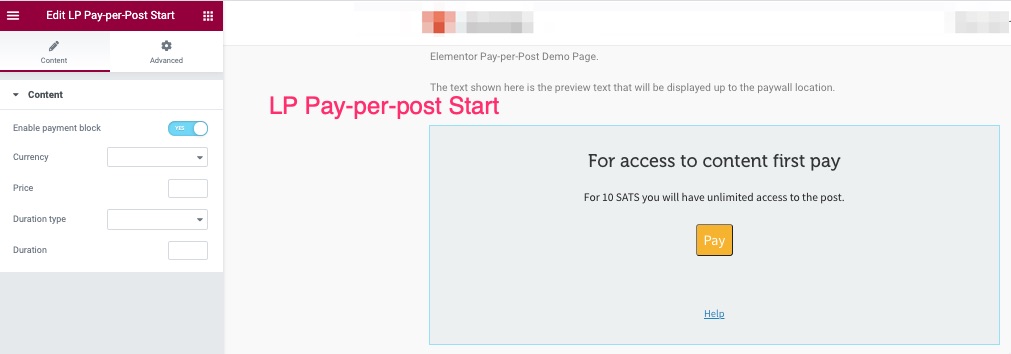
There is a possibility that the block BTCPW pay-per-post start can be customized to the individual requirements.
The BTCPayWall is automatically enabled on the page. With “Enable Paywall” the paywall can be disabled or enabled for this page.
The settings Currency and Duration are set to Default by default. The settings that were made in General Settings are then applied.
If you want to keep these values, no changes are necessary. If you want to make an individual setting for the selected blog post, you can do this here.
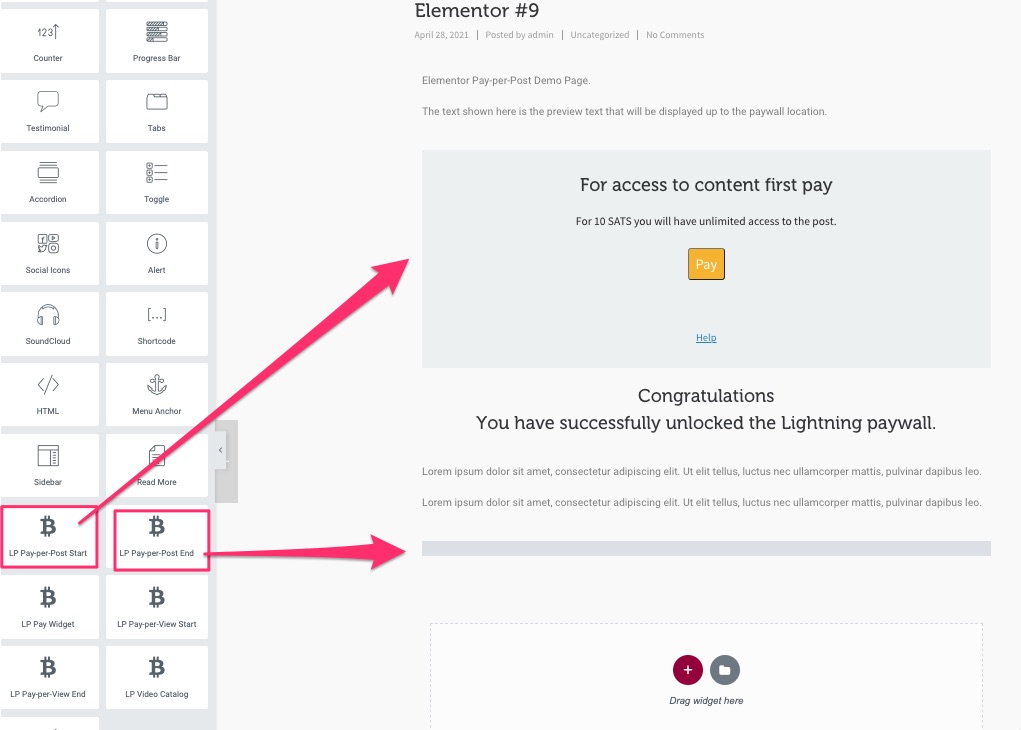
From the content, which should be protected by paywall, the block BTCPW Pay-per-Post Start is used.
Then you create the content with your Elementor Website Builder. As usual, all other Elementor Elements can be used.
At the end of the blog post the protected area is closed with the BTCPW Pay-per-Post End block.
If you want to see what the finished page looks like from a user’s point of view and give it a try, go to the page:
Pay-per-Post Demo Page
Pay-per-view / Pay per single Video
With Pay-per-View you can sell videos through the BTCPayWall.
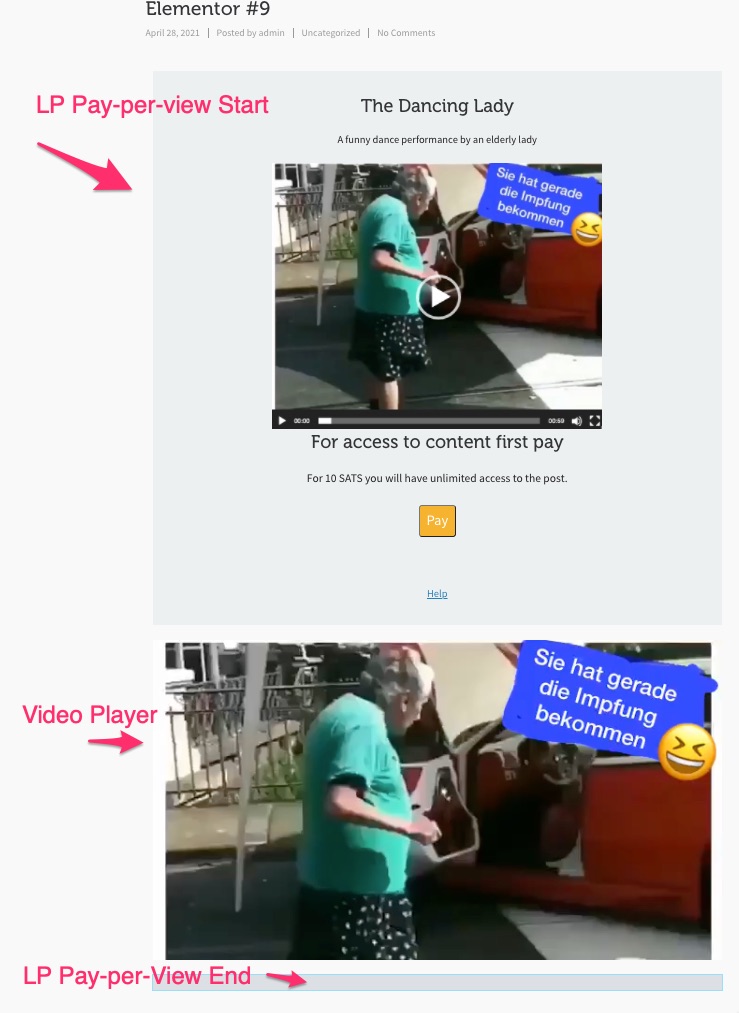
The user sees a preview for each video, consisting of a caption, a description text and an image. In addition, the details of the video’s price are displayed.
After successful payment, the video is displayed and played on the website.
The video, which is played after successful payment, can be on your own server, but also on an external server.
For example, you can show videos that are stored on YouTube or Vimeo.
In order not to offer these videos to the general public for free, you can set the video to private. Then the video will not be shown in the search.
Only those who know the exact internet address can access this video.
If you want to offer a Vimeo or YouTube video for a fee, set it to private and store this secret Internet address as a paywall url.
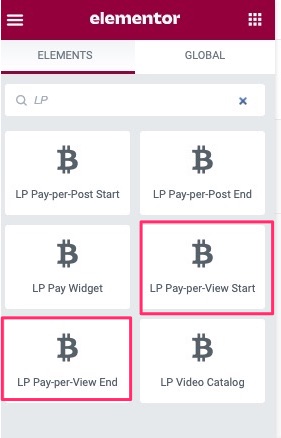
You can search for BTCPW (BTCPayWall) within the Element search and get the available Lightning Paywall elements displayed.
The BTCPayWall elements begin with BTCPW for BTCPayWall.
You can also find the Bitcoin Paywall blocks under the General category.
The name of the pay-per-view elements at Elementor are:
- BTCPW Pay-per-View Start
- BTCPW Pay-per-View End
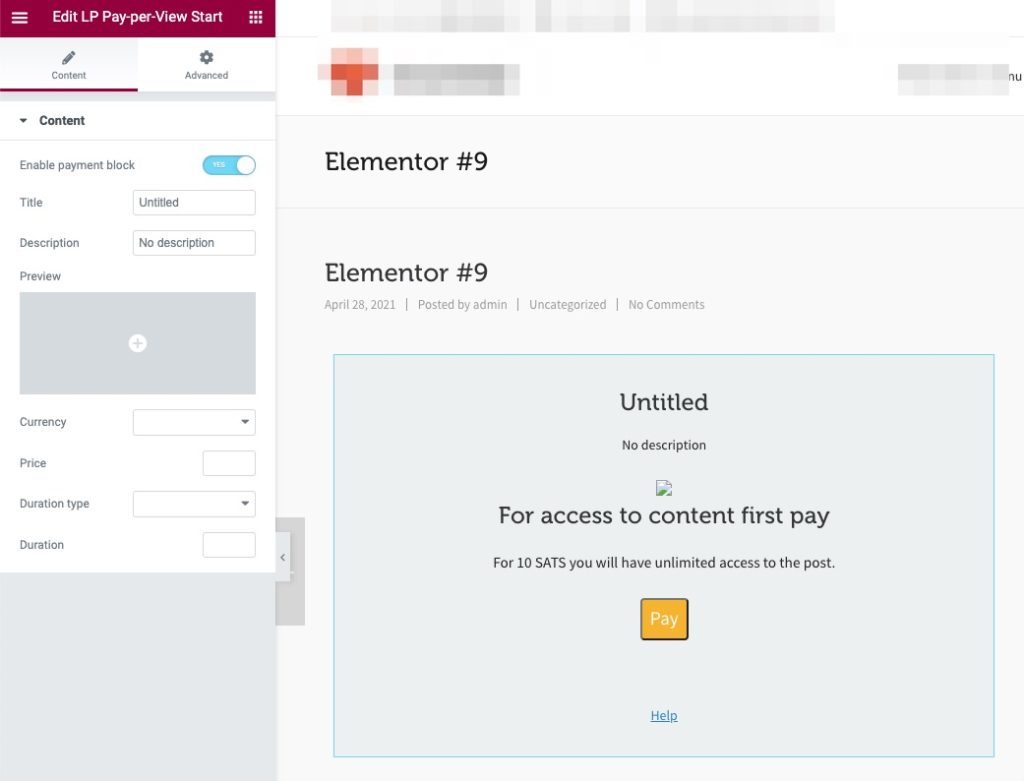
There is a possibility that the element BTCPW pay-per-view start can be customized to the individual requirements.
The BTCPayWall is automatically enabled on the page. With “Enable Paywall” the paywall can be disabled or enabled for this page.
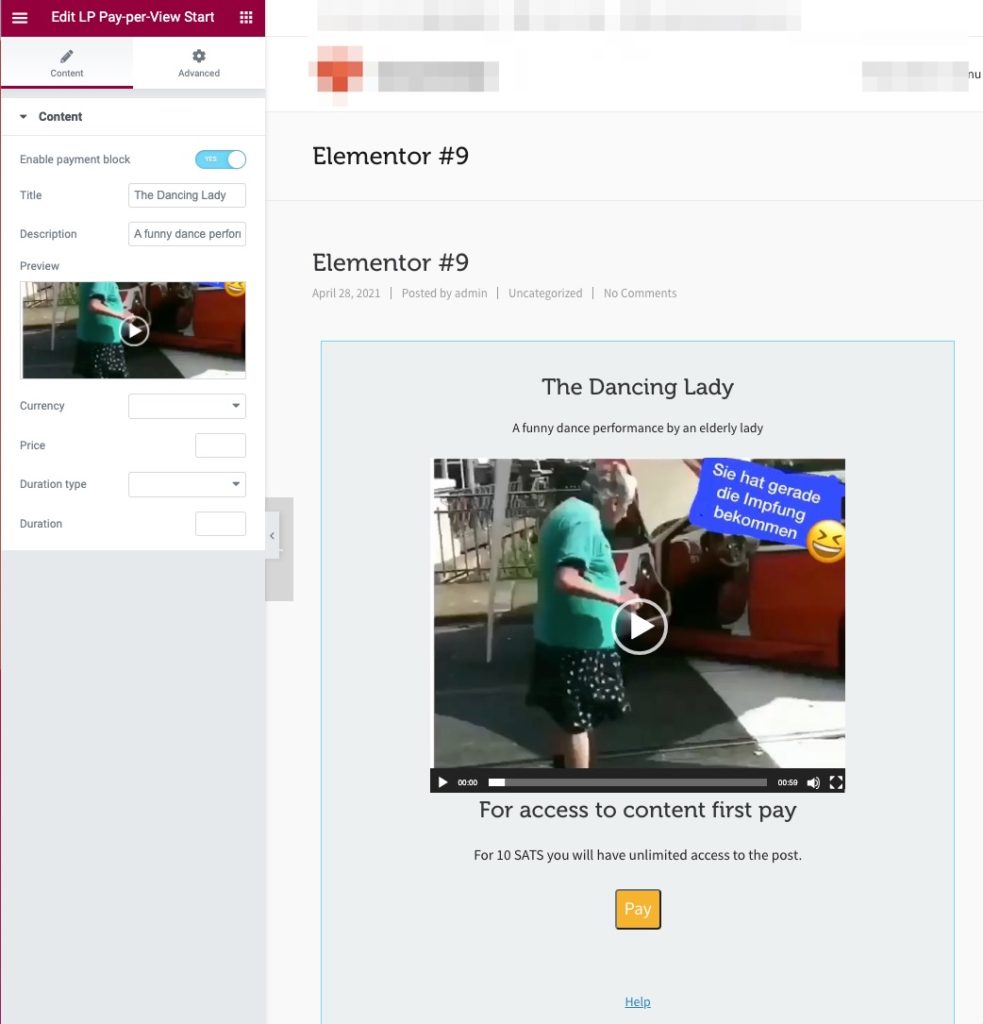
In the Title field you can enter the title of the video.
The Description field is the place to briefly describe the video.
The Video Preview field is used to select an image that will be used as a preview image. Here you can access the images that are stored under Media on the WordPress server.
The settings Currency and Duration are set to Default by default. The settings that were made in General Settings are then applied.
If you want to keep these values, no changes are necessary. If you want to make an individual setting for the selected blog post, you can do this here.
After you have added a caption, a video description and a thumbnail, it will look something like the picture on the right.
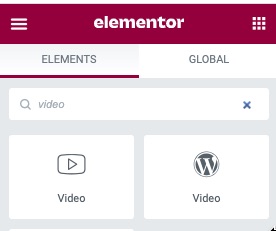
After you edit BTCPW Pay-per-View start, insert the video that should be played after a successful payment.
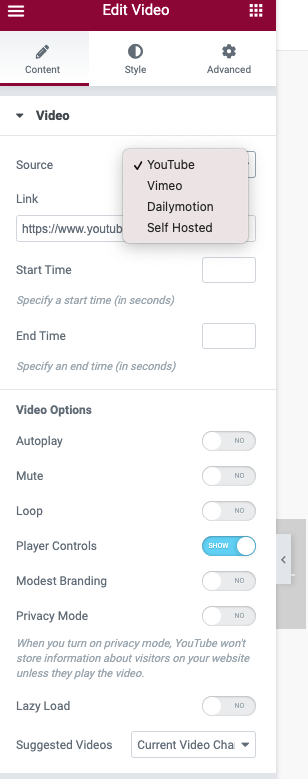
For this you use a video player offered by Elementor.
Make sure that the video player is suitable for your video format and the location of the video.
If a video is stored on YouTube or Vimeo, a different video player may be required than if the video is stored on a server.
After the embedded video, the element with the designation BTCPW Pay-per-View End is inserted and the video can be offered for a fee.
If you want to see what the finished page looks like from a user’s point of view and give it a try, go to the page:
Pay-per-View Video Demo Page
Pay-per-file / Pay per single File or per Download
With the pay-per-file function, individual files can be sold as downloads.
– You have written your own software that you want to offer to your customers for download?
– You have written a manual, a handbook or an eBook and want to sell it as a PDF file?
– You are a photographer and want to market your pictures yourself?
– You have composed your own piece of music or produced a video, which you want to offer to your fans as an mp4 file for download.
The pay-per-file function is like a digital content store. You can sell any file format on the Internet and offer it to your customers for download.
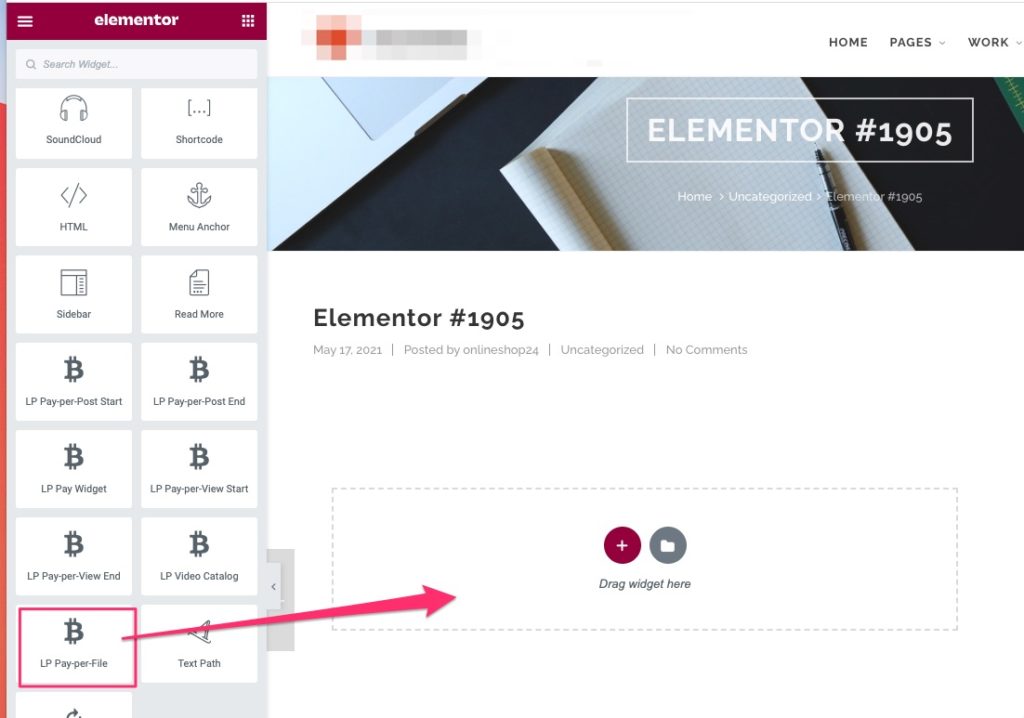
In the Elementor Editor, the BTCPW pay-per-file element is selected and inserted in the appropriate place.
Then we start to make the individual settings.
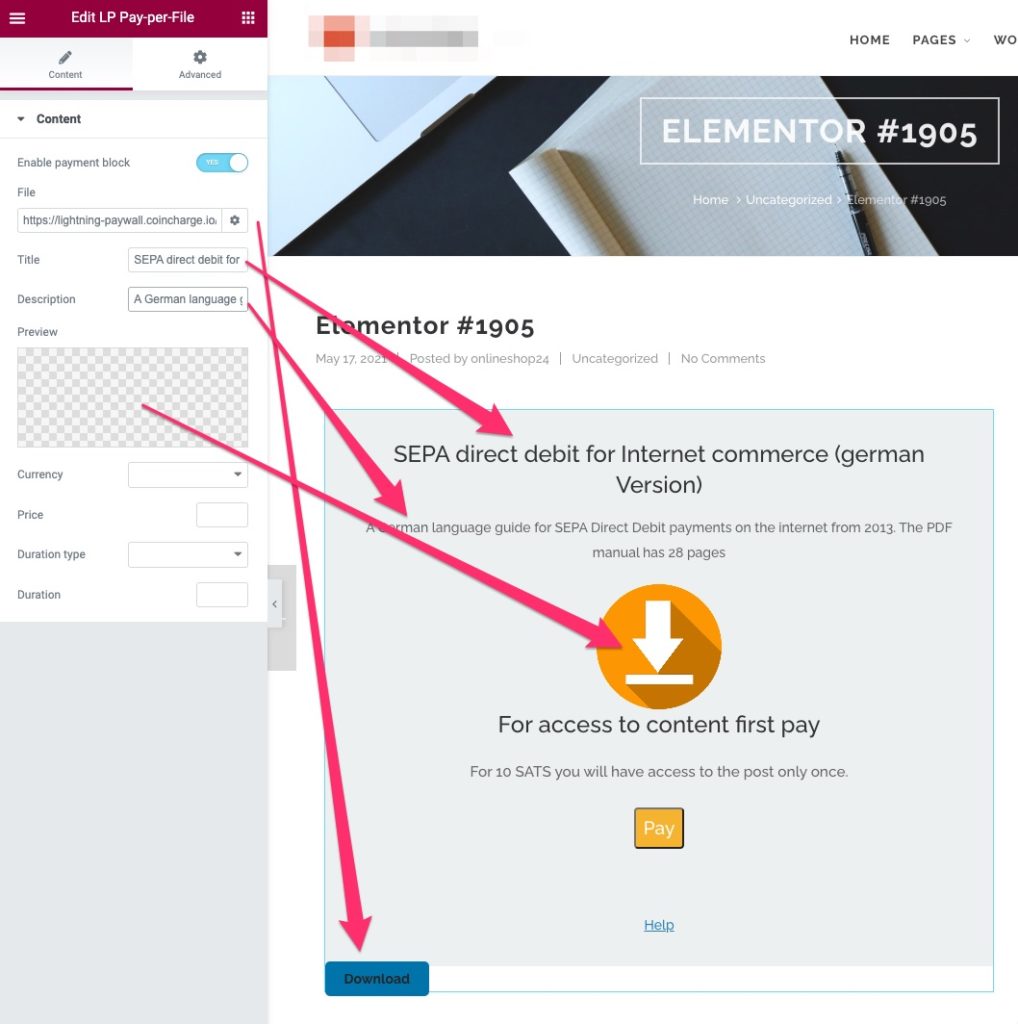
The Payment Block is activated automatically.
In the File field we specify where the file is stored, which is offered for sale.
Here we store the url to the server or the directory where the file was stored, which is to be sold.
This file can be located on the WP server, but also on any other server.
In the preview view, at the bottom of the page, you will see a button called Download.
In the Title field we enter the title and in the Description field we can write a detailed description about the offered file.
Only text can be entered in these fields.
HTML commands cannot be used.
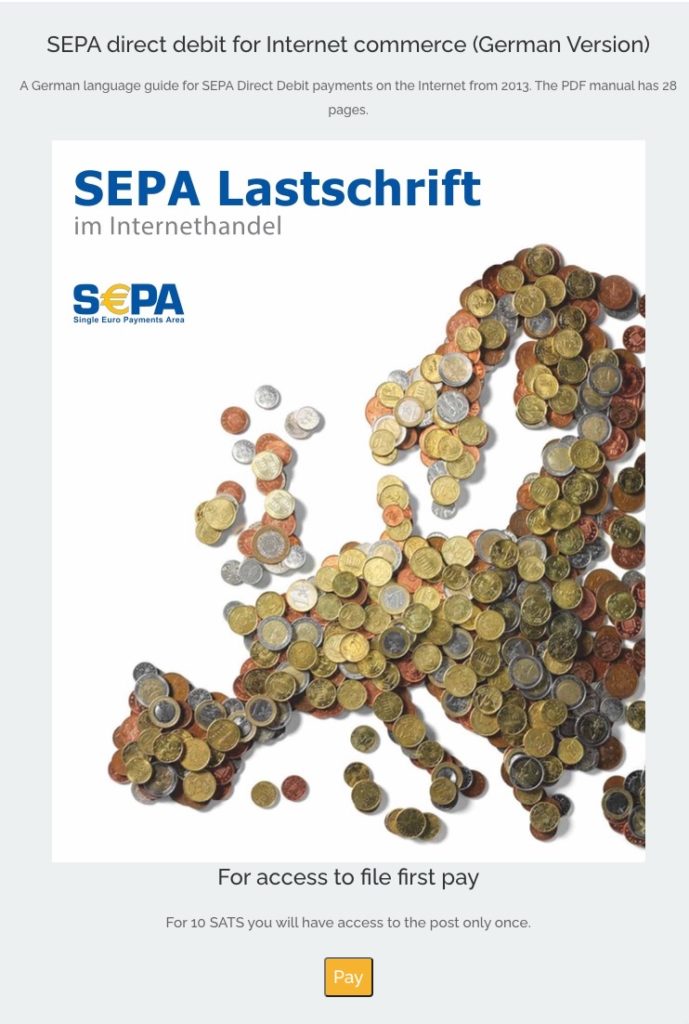
In the Preview field we can enter a preview image, which we select from our media directory.
If no preview image is entered, a download image will be displayed, as in our example.
In the fields Price and Duration we can make individual settings.
If we do not make any changes, the data from the General Settings will be used.
You can see how the page looks like for the customer by following the link below.
If you want to see what the finished page looks like from a user’s point of view and give it a try, go to the page:



4 Comments
Leave your reply.