Setup Payment Gateway for BTCPaywall
Set up Bitcoin payment gateway for BTCPay server or opennode
Bitcoin payment gateway for BTCPay server or opennode
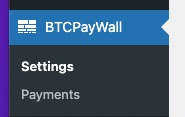
After BTCPayWall has been successfully installed on your WordPress instance, you will find the new menu item “BTCPayWall” with the sub-items Settings and Payments.
In the Settings section the settings for the connection to the payment gateway and to the different modules are made.
In the Payments section, the individual payments are listed.
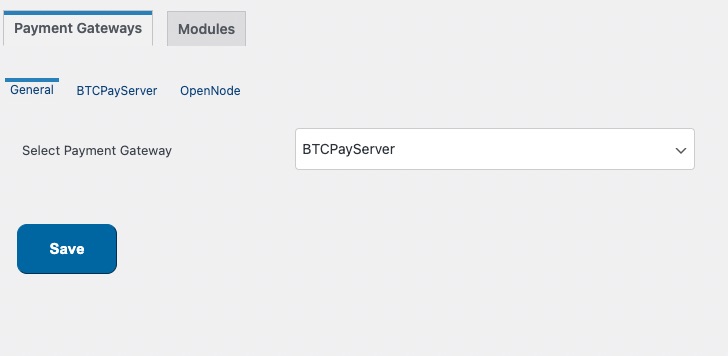
The first menu item is the General Settings for the payment gateway.
Here you have the possibility to select from the available payment gateways the gateway through which the payment processing is to be carried out.
When using BTCPay Server you need a BTCPay Store on your own BTCPay Server or you can share an existing BTCPay Server. If you don’t have your own BTCPay server, you can use the BTCPay server of Coincharge.
Instructions on how to set up an account on a BTCPay server can be found here: Setup a BTCPay Store
Alternatively to a BTCPay Server you can also use the provider opennode. Create an account at opennode and verify this account so that it is activated for receiving Bitcoin and Lightning payments.
BTCPay Server
Bitcoin payment gateway for BTCPay server
After creating an account in the form of a BTCPay store, it is necessary to connect BTCPayWall to this BTCPay store.
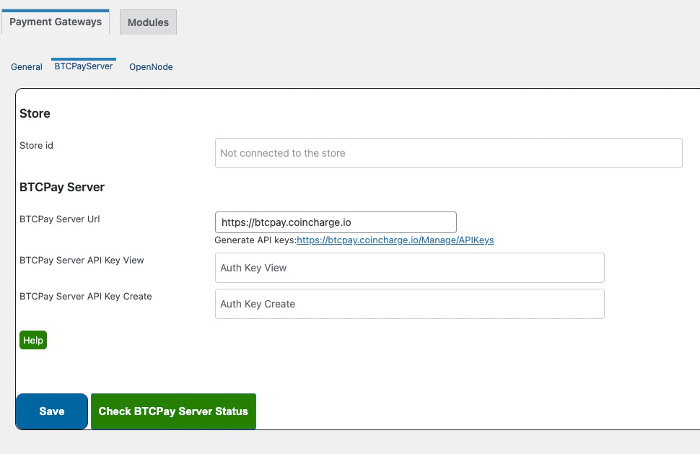
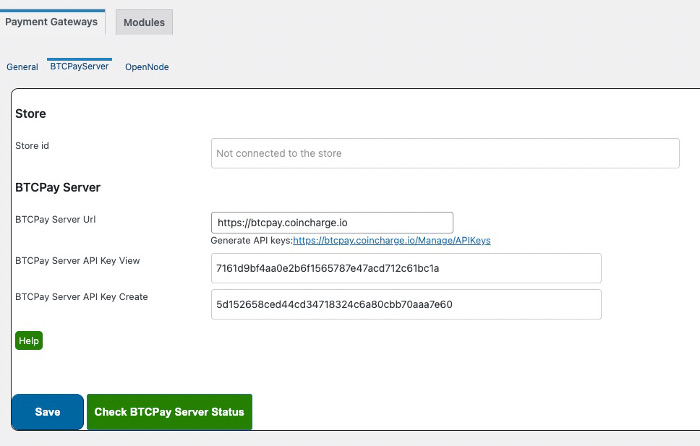
We switch to the menu item Payment Gateways => BTCPayServer and get the adjacent view.
In the field BTCPay Server Url we enter the url of the BTCPay Server we want to use.
If you use your own BTCPay server, the corresponding url. If you don’t have your own BTCPay server and have set up a BTCpay store at Coincharge, then enter htpps://btcpay.coincharge.io.
A url will appear after the text: Generate API keys.
Click on this link and you will be redirected to the API configuration of your BTCPay server.
When you are logged in to the BTCPay server, you will be directed to the area where you can create two API keys for your BTCPay store.
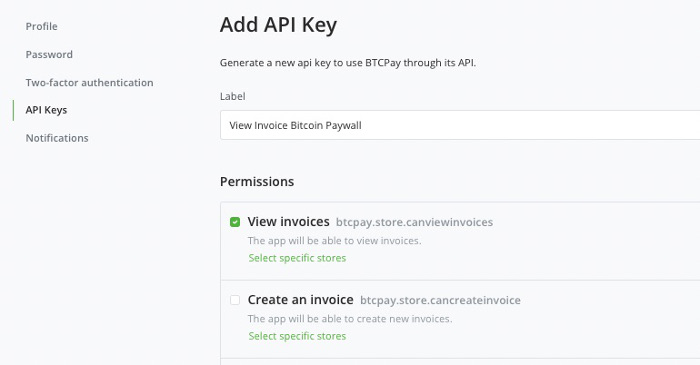
One API key is needed for creating invoices (Create an Invoice) and the second API key is needed for viewing the created and paid invoices (View Invoices).
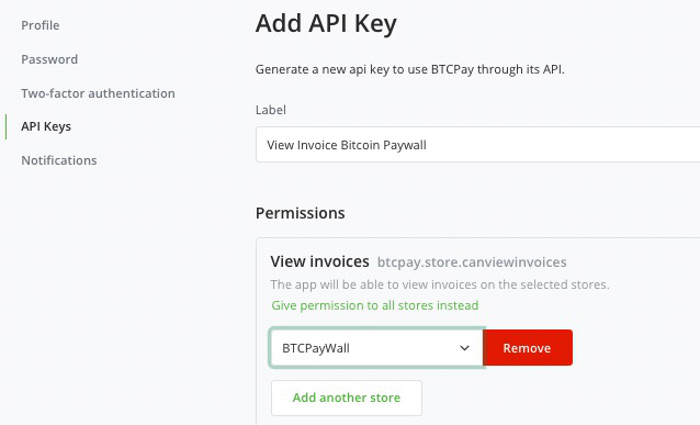
In order to be able to distinguish the API Keys later on, we choose a unique name under Labels, for example View Invoices and the name of the BTCpay Store.
After you have decided on a unique name, make sure that you specify the store for which this API key is to be generated.
If you have checked the View Invoices box, you will see the note “Select specific store” in green letters.
At this point, the corresponding store is selected.
Then scroll to the bottom of the page and save the setting and the API key will be generated.
After doing this for View, repeat this process for Create and create another API key for it.
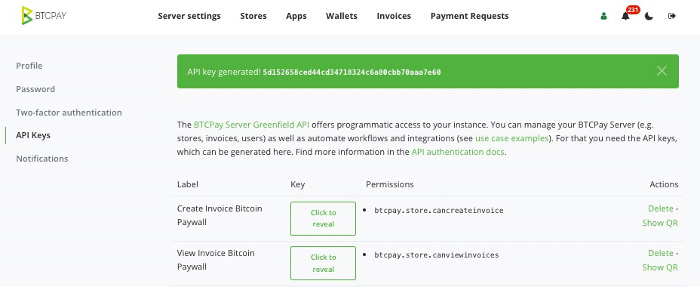
If you have successfully created two API Keys, it will look like the picture on the right. To display the respective API key, click on “Click to reveal” and then on “Copy to clipboard.
The two API Keys must now be stored in the BTCpayWall Payment Gateway Settings.
If you have successfully created two API Keys, it will look like the picture on the right. To display the respective API key, click on “Click to reveal” and then on “Copy to clipboard.
The two API Keys must now be stored in the BTCpayWall Payment Gateway Settings.
To do this, we switch back to our WordPress page and there to the menu item BTCPayWall. In the Payment Gateway Settings for the BTCPay Server we enter the created API Key for View in the field: BTCPay Server API Key View. In the Create field we enter the API Key that was created for Create.
Then save the settings with Save. To check the settings, click on the button “Check BTCPay Server Status”. If all settings were made correctly, the positive status is displayed in green.
If an error was made, the message “Something went wrong. Please check your credentials.”
In most cases, the problem arose because no selection was made when choosing the store.
If the connection to the BTCPay server has been successfully established, the Store ID will also be displayed in the corresponding field. It is therefore not necessary to fill in this field yourself.
opennode
Bitcoin payment gateway for opennode
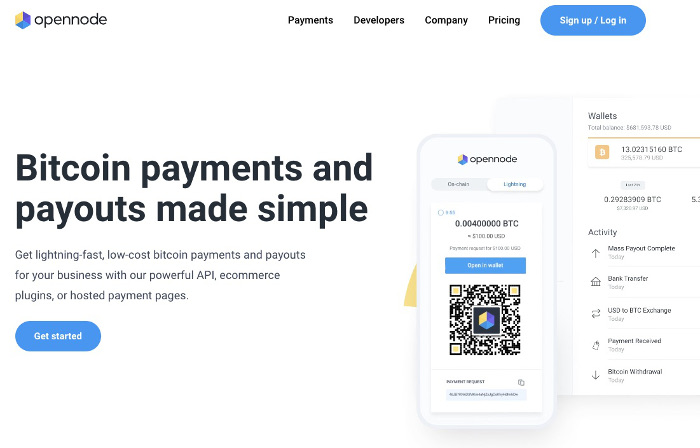
Those who want to use the BTCPayWall with the Bitcoin and Lightning payment provider opennode create an account via the opennode homepage.
opennode requires merchants to go through a KYC process. For this purpose, the appropriate information must be provided.
After this process has been successfully completed, the required API key can be created.
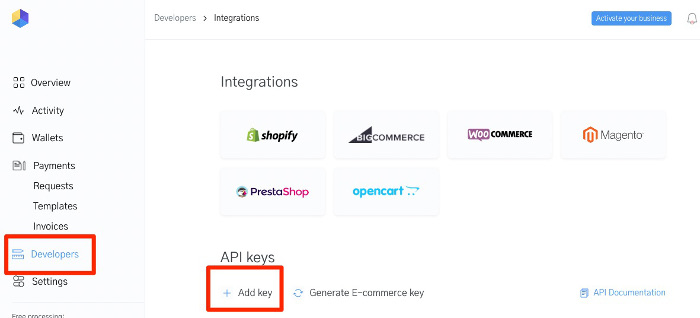
To do this, go to the menu item Developers and in the area API keys you can create a new API key.
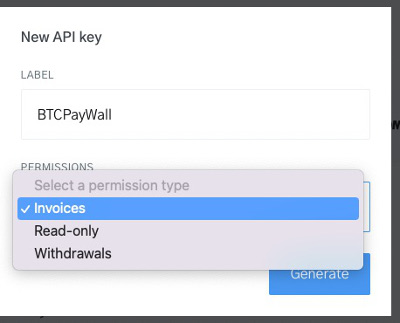
If you click on the plus sign next to Add key, a pop-up window opens.
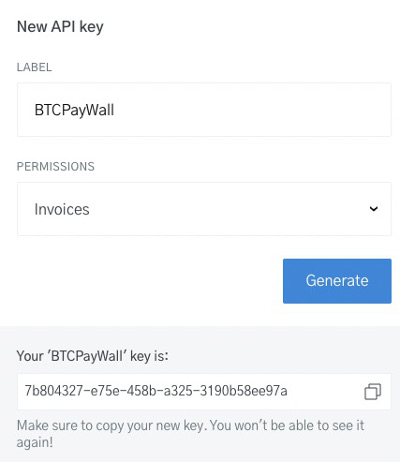
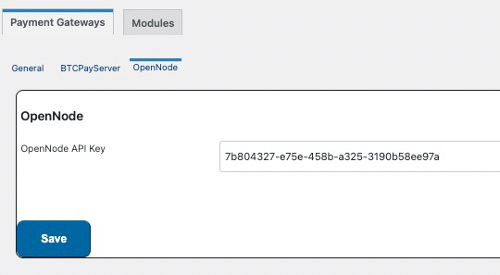
The newly created API key is displayed once. It should be copied and kept, as this key cannot be displayed again.



Leave a Reply
Your email is safe with us.